
Bubbling paint on stucco is one of those home maintenance problems that starts small, looks annoying, and quietly turns into a big, expensive mess if you ignore it. The good news? You can absolutely fix it yourself. The better news? Once you understand why it’s happening, you’ll stop it from coming back.
Let’s walk through everything — the causes, the prep, the repair process, and what to do after the fact.
Why Is Your Stucco Paint Bubbling in the First Place?
Before you grab a scraper and go to town, you need to understand what’s actually going on beneath those bubbles. Stucco is a porous material. It breathes. And when something interferes with that breathing cycle — moisture, heat, incompatible paint, poor surface prep — bubbles form as the paint tries to lift away from the surface.
Here are the most common culprits:
- Moisture intrusion — This is the big one. Water gets behind the stucco or into the wall assembly, heats up, and pushes the paint off the surface from the inside out.
- Painting over wet or damp stucco — If the surface wasn’t fully dry before you (or a previous painter) applied paint, you’ve basically sealed moisture inside.
- Wrong paint type — Oil-based paints on stucco are notorious for this. Stucco needs a breathable, masonry-appropriate paint like elastomeric or acrylic latex.
- Heat expansion — Dark paint colors on stucco in direct sunlight absorb heat aggressively. If the paint film isn’t flexible enough, it bubbles.
- Failing previous paint layers — Multiple layers of incompatible paint built up over years can start separating from each other or from the substrate.
Know your enemy before you fight it. If you don’t fix the source of the moisture, you’ll be back out there with a scraper in six months.
Tools and Materials You’ll Need
Don’t make three trips to the hardware store. Gather everything before you start.
| Item | Purpose | Approximate Cost |
| Stiff wire brush | Removing loose paint and debris | $5–$15 |
| Paint scraper (wide blade) | Lifting bubbled paint sections | $10–$20 |
| Putty knife | Detail work around edges | $5–$12 |
| Stucco patching compound | Filling surface damage | $15–$30 |
| Masonry primer | Bonding layer before top coat | $25–$45 |
| Moisture meter | Diagnosing hidden water issues | $20–$60 |
| Caulk gun + paintable caulk | Sealing cracks before painting | $10–$25 |
| Drop cloths + painter’s tape | Protecting surrounding surfaces | $10–$20 |
Step-by-Step: How to Fix Bubbling Paint on Stucco
Step 1 — Diagnose Before You Demo
Don’t skip this. Grab a moisture meter and test the wall in multiple spots, especially around windows, rooflines, and where the stucco meets other materials. A reading above 17–19% moisture content means you’ve got a water intrusion problem that needs to be resolved before any painting happens.
Check for:
- Cracks in the stucco (even hairline cracks let in water)
- Gaps around window frames, door frames, or utility penetrations
- Missing or deteriorating caulk joints
- Faulty gutters or downspouts directing water toward the wall
If you find active water intrusion, fix that first. Seal the source. Let the wall dry completely — and in humid climates, that can take two to four weeks.
Step 2 — Remove All the Bubbled and Loose Paint
This part isn’t glamorous, but it’s where the whole repair lives or dies. Use your paint scraper and wire brush to remove every bubble, every flaking section, every piece of paint that isn’t firmly bonded to the surface.
Be aggressive here. If you leave loose paint under your repair, the new coat will bubble right along with the old one.
- Work in sections, top to bottom
- Scrape at a low angle to avoid gouging the stucco
- Use the wire brush to rough up sound edges around scraped areas so the new paint has something to grip
- Vacuum or blow out all the dust and debris
You’re not trying to strip the entire wall. You’re trying to get down to every area where the bond is compromised.
Step 3 — Repair Any Damaged Stucco
Bubbling and scraping often reveal surface damage underneath — small gouges, hairline cracks, or eroded texture. These need to be repaired before priming.
For hairline cracks, apply a paintable elastomeric caulk and tool it flush. For larger divots or damaged sections, use a premixed stucco patching compound. Match the texture as closely as you can — stucco has a specific look, and a smooth patch in a textured wall sticks out like a sore thumb.
Let all patching compound cure fully per the manufacturer’s instructions. Don’t rush this. Most compounds need at least 24 hours before you prime over them, and some require 48–72 hours.
Step 4 — Clean the Entire Surface
Once the patching is done and cured, clean the full wall. Loose paint residue, chalking, mildew, and dirt will all compromise your paint bond.
The best approach:
- Apply a diluted bleach solution (1 part bleach, 3 parts water) to kill any mold or mildew
- Let it sit for 10–15 minutes
- Rinse thoroughly with a garden hose or low-pressure wash
- Allow the wall to dry completely — minimum 48 hours in dry conditions, longer in humid weather
Pressure washing is an option, but use caution. High pressure can damage stucco, especially older or already-compromised surfaces. Keep it under 1,500 PSI and hold the nozzle at least 12 inches from the surface.
Step 5 — Apply a Masonry Primer
This step gets skipped constantly, and it’s one of the main reasons paint bubbles in the first place. A quality masonry primer does several things:
- Seals the porous stucco so paint sits on the surface instead of soaking in unevenly
- Creates a consistent bonding layer between old and new paint
- Locks down any remaining chalk or powdery residue
- Reduces the likelihood of future moisture-related adhesion failures
Use an acrylic masonry primer, not an all-purpose interior primer. Read the label — it should explicitly say it’s for masonry or stucco applications.
Apply the primer with a thick-nap roller (3/4 inch nap minimum to get into the texture) or spray it on for large surfaces. Cut in around edges and trim with a brush. Allow the primer to dry fully before moving to paint.
Step 6 — Apply the Right Paint
Not all exterior paints are built for stucco. Your two best options are elastomeric paint and 100% acrylic latex masonry paint.
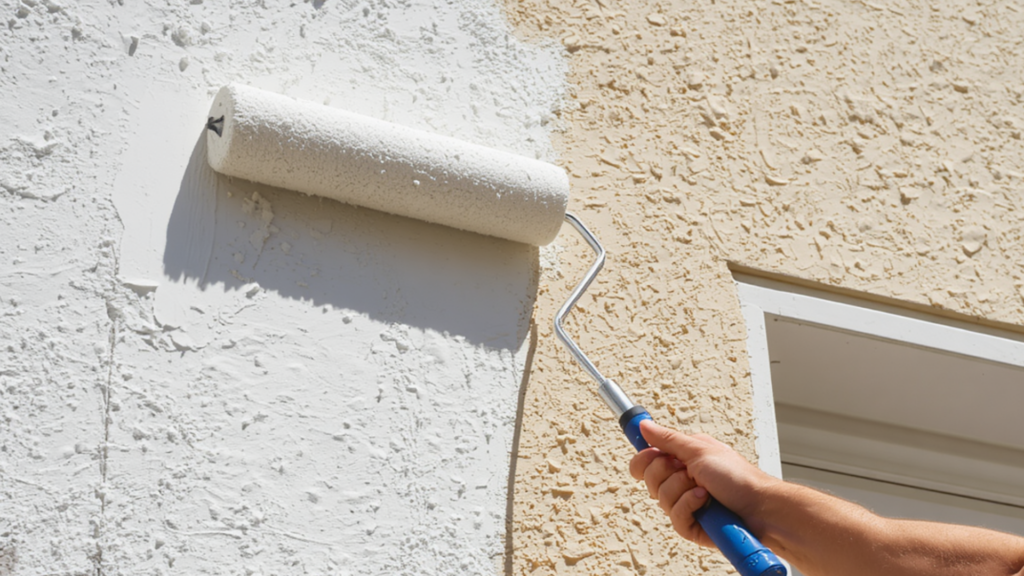
Elastomeric paint is the premium choice. It’s thick, flexible, and actually bridges small cracks as the wall expands and contracts with temperature changes. It creates a waterproof barrier without trapping moisture vapor — exactly what stucco needs.
Acrylic latex masonry paint is more affordable and works well on stucco that isn’t dealing with significant moisture exposure.
What to avoid:
- Oil-based paints (they seal moisture in and crack with thermal movement)
- Interior paints used outdoors (they break down fast and don’t breathe correctly)
- Budget bargain paints that don’t specify masonry compatibility
Apply in at least two coats with a 3/4 to 1-inch nap roller. Stucco textures love eating paint — don’t be surprised if the coverage rate is 20–30% lower than what the can suggests. Back-roll any sprayed areas immediately to push paint into the texture.
What If the Bubbling Keeps Coming Back?
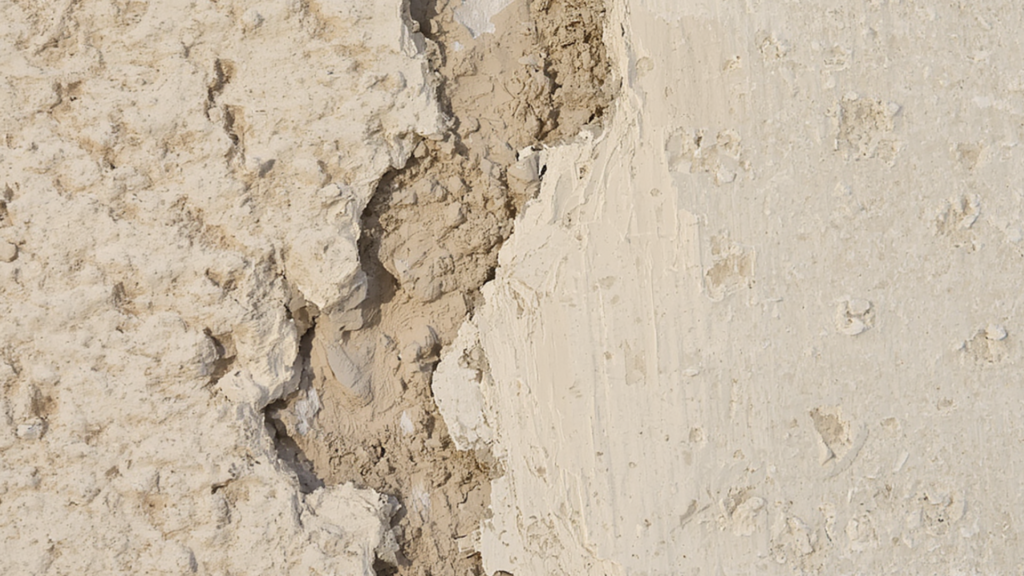
If you fix the paint and it bubbles again within a season or two, your wall has a moisture problem that surface repairs alone won’t solve.
Signs that point to a deeper issue:
- Bubbles appearing near the base of the wall (ground moisture wicking up)
- Bubbles concentrated around windows or doors (flashing failure or bad caulk)
- Large sections failing on a north-facing wall (slow-drying, chronic dampness)
- Rust-colored staining inside or around bubbled areas (water infiltration through metal lath)
At that point, you may need a stucco contractor to assess whether the wall assembly itself — the wrap, lath, or weep screeds — has been compromised. Some situations call for partial or full stucco removal and reinstallation. That’s not a DIY territory most homeowners should wander into without professional guidance.
Preventing Bubbling Paint on Stucco Long-Term
Fixing the problem is satisfying. Not having to fix it again is better.
Here’s what keeps stucco paint looking solid year after year:
- Caulk every joint annually — Window frames, door frames, utility penetrations, and any place where two different materials meet are all potential entry points for water.
- Maintain your gutters — Overflowing gutters dump water directly onto walls. Clean them twice a year.
- Repaint before you have to — Waiting until the paint is fully failing means you’re starting from a worse surface. Recoating every 5–7 years on a well-maintained stucco exterior is a reasonable cycle.
- Use light to medium paint colors — Dark colors absorb more heat, which accelerates film failure. If you love a dark exterior, choose a premium elastomeric paint rated for high UV exposure.
- Inspect after storms — High winds, driven rain, and hail all introduce new damage points. A quick visual inspection after major weather events catches problems early.
When to Call a Professional
DIY stucco paint repair is absolutely within reach for most homeowners. But there are situations where calling in a pro is the smarter play:
- The bubbling covers more than 30–40% of the exterior
- You’ve found active water intrusion you can’t source
- The stucco itself is crumbling, delaminating, or has soft spots when pressed
- Your home is older and may have multiple incompatible paint layers requiring a chemical stripper or heat gun treatment
- The wall texture is historically specific and needs skilled matching
Getting a professional assessment doesn’t mean you’re handing over the whole job. Sometimes a contractor can diagnose the source problem, and you handle the painting yourself once it’s resolved.
A Quick Word on Timing and Weather
Even a perfect repair will fail if you do it at the wrong time. Paint and primer need specific conditions to cure properly.
Best conditions for painting stucco:
- Air and surface temperatures between 50°F and 90°F
- No rain forecast for at least 24–48 hours after application
- Relative humidity below 85%
- Not in direct peak sunlight (paint dries too fast and doesn’t bond properly)
Early morning or late afternoon application on warm — not hot — days gives you the best results. Painting on a scorching August afternoon when the stucco is already 110°F to the touch is a recipe for bubbles before the roller leaves the wall.
Conclusion
Bubbling paint on stucco is rarely just a cosmetic issue — it’s your wall telling you something is wrong. Whether the culprit is trapped moisture, a bad paint job from three owners ago, or a caulk joint that gave up years back, the fix is straightforward when you approach it methodically. Diagnose the source, remove what’s failing, patch what’s damaged, prime correctly, and paint with a product actually built for masonry. Do it right once, and your stucco can look sharp and stay protected for years without demanding your attention again.
Frequently Asked Questions
Can I paint over bubbling paint on stucco without removing it?
No — and this is where a lot of people waste their time and money. Painting over bubbled paint just adds another layer to an already-failed surface. The new paint will bubble along the same lines, or worse. You have to scrape down to sound, well-bonded paint before applying anything new.
How long does stucco need to dry before painting after a repair?
Fresh stucco patching compounds typically need 24–72 hours before priming, depending on temperature and humidity. If you’ve done major wet patching or repairs, some manufacturers recommend waiting up to 28 days for full cure before applying a topcoat. Check your specific product’s data sheet for guidance.
What is the best paint to use on stucco to prevent bubbling?
The best paint for stucco to prevent bubbling is 100% acrylic exterior masonry paint.